Dials, gears and rondels
Orloj: The Prague Astronomical Clock is a mid-weight euro from Perro Loko Games, who got on our radar last year with the superb euro game Phoenix New Horizon.
In this game players are master builders who help construct the legendary clock of Prague - and with this theme come some of my favorite gimmicks: dials, gears and rondels. I tend to enjoy these in every game I see them in.
There is quite a lot going on, so I better get started with some gameplay details.
TL;DR
It’s hard to do a short summary for this one. It’s a mid weight game, but filled to the brim with smaller actions that have their little nuances and are interconnected in fun ways. There are always a bunch of things you could choose to do on your turn, yet I never felt analysis paralysis. In spite of the options, it isn't loose either. I feel like it’s a very well put-together euro game with enough setup variability and engaging gameplay to keep you entertained for many many games. The action selection itself is awesome, but so are many of the other things thanks to rondels and other fun ideas.
Some gameplay details
I always find it important to go a bit into how the game works, before diving into more general thoughts, so I’ll try to describe the gameplay without going into too much detail.
The game’s structure itself is straightforward: Each turn you either do an action, or pass (claiming back workers). There are no traditional rounds, you just play turns until the end is triggered.
The action selection is the real highlight of Orloj: To do an action, you first rotate the small astronomical dial on the main board clockwise, then optionally rotate the bigger clock face counter-clockwise, then place a worker into the slot where the finger of the small dial points to. With this you just picked a combination of two actions, which you now get to execute. Of course these clock rotations are somewhat restricted, so you might need to flip your little gear tokens to force more deviations. At first, seeing this clock mechanism seemed daunting, but we quite quickly got a good handle on it. There is no worker-blocking by the way, you just bump back workers to their owner (even your own) if you choose a spot that is occupied.
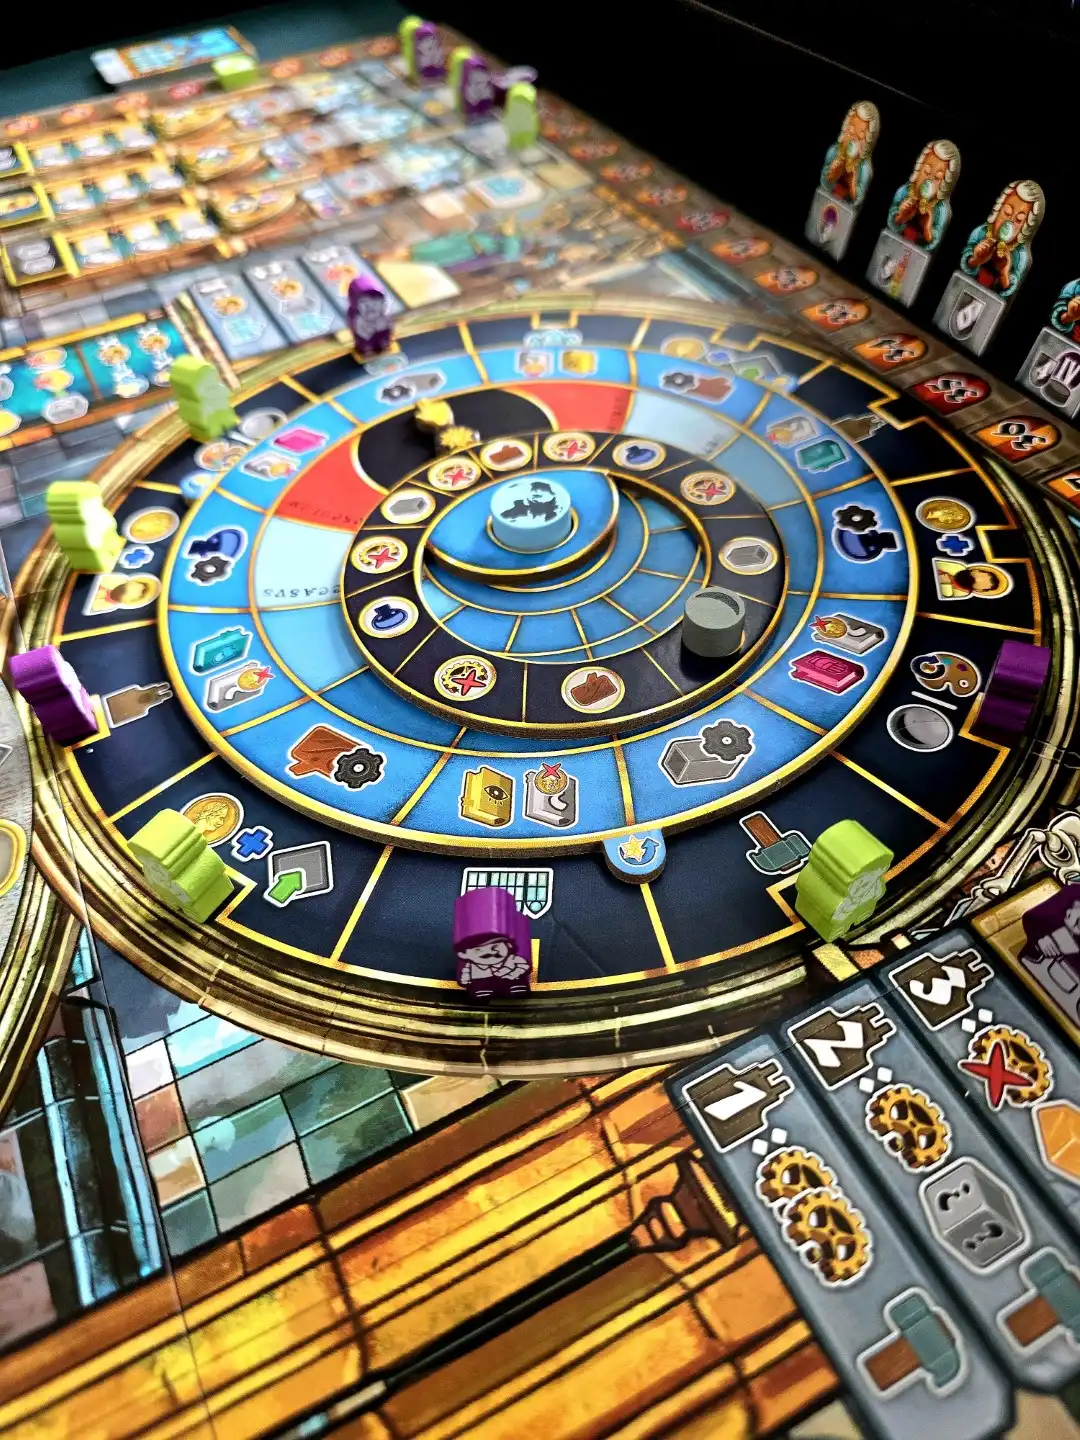
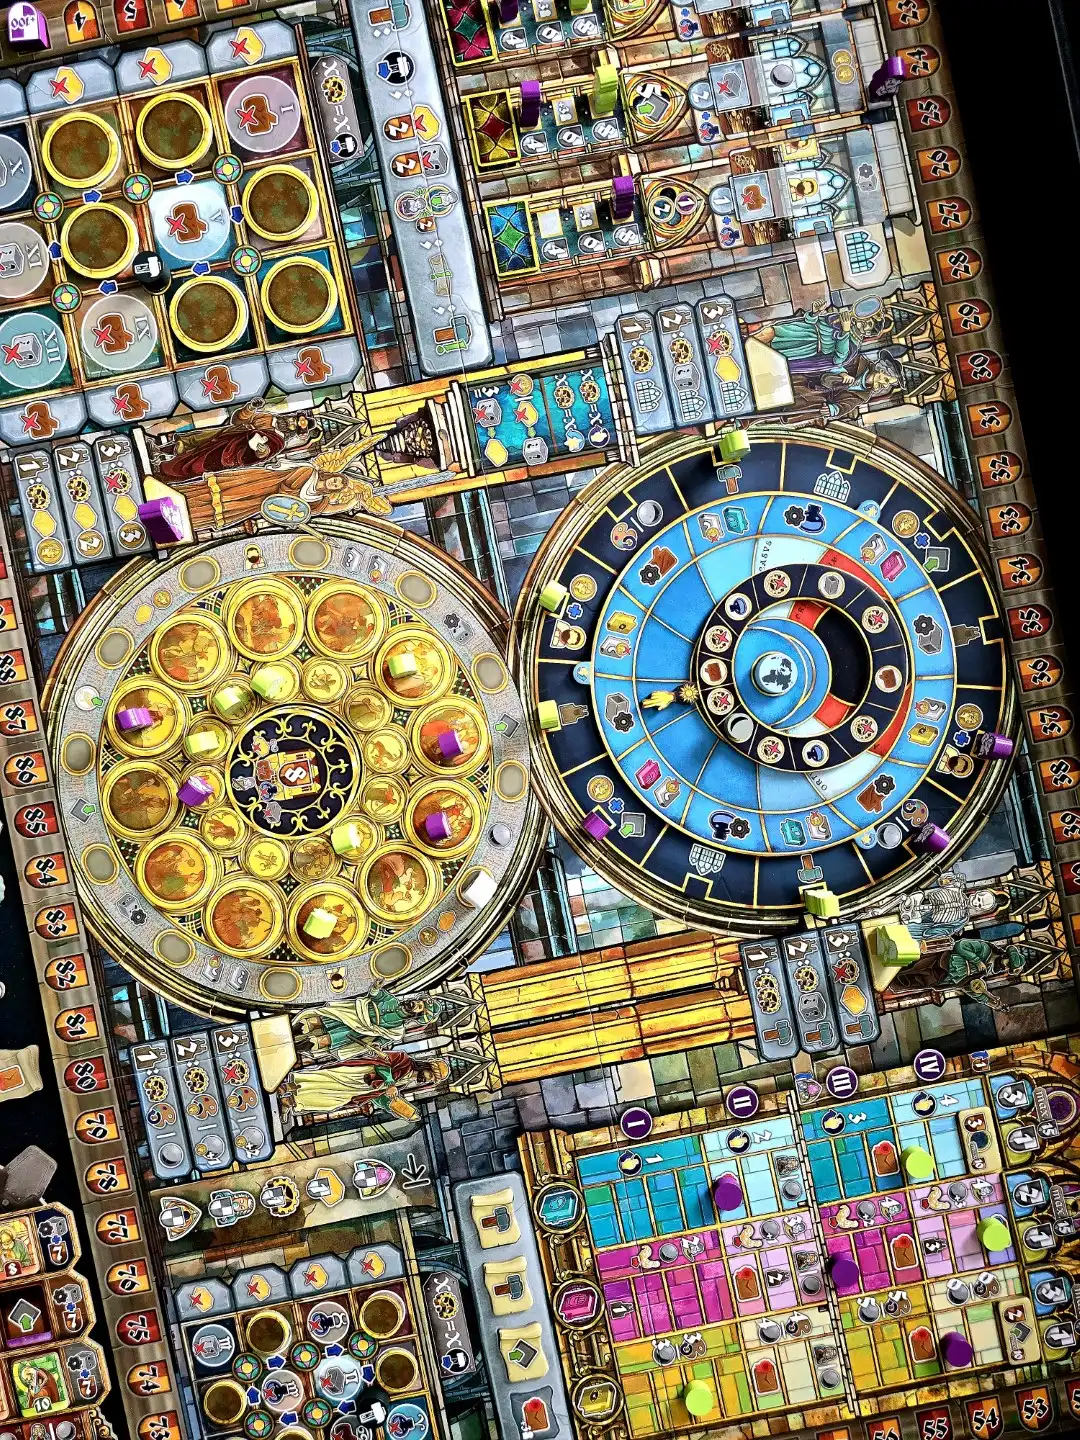
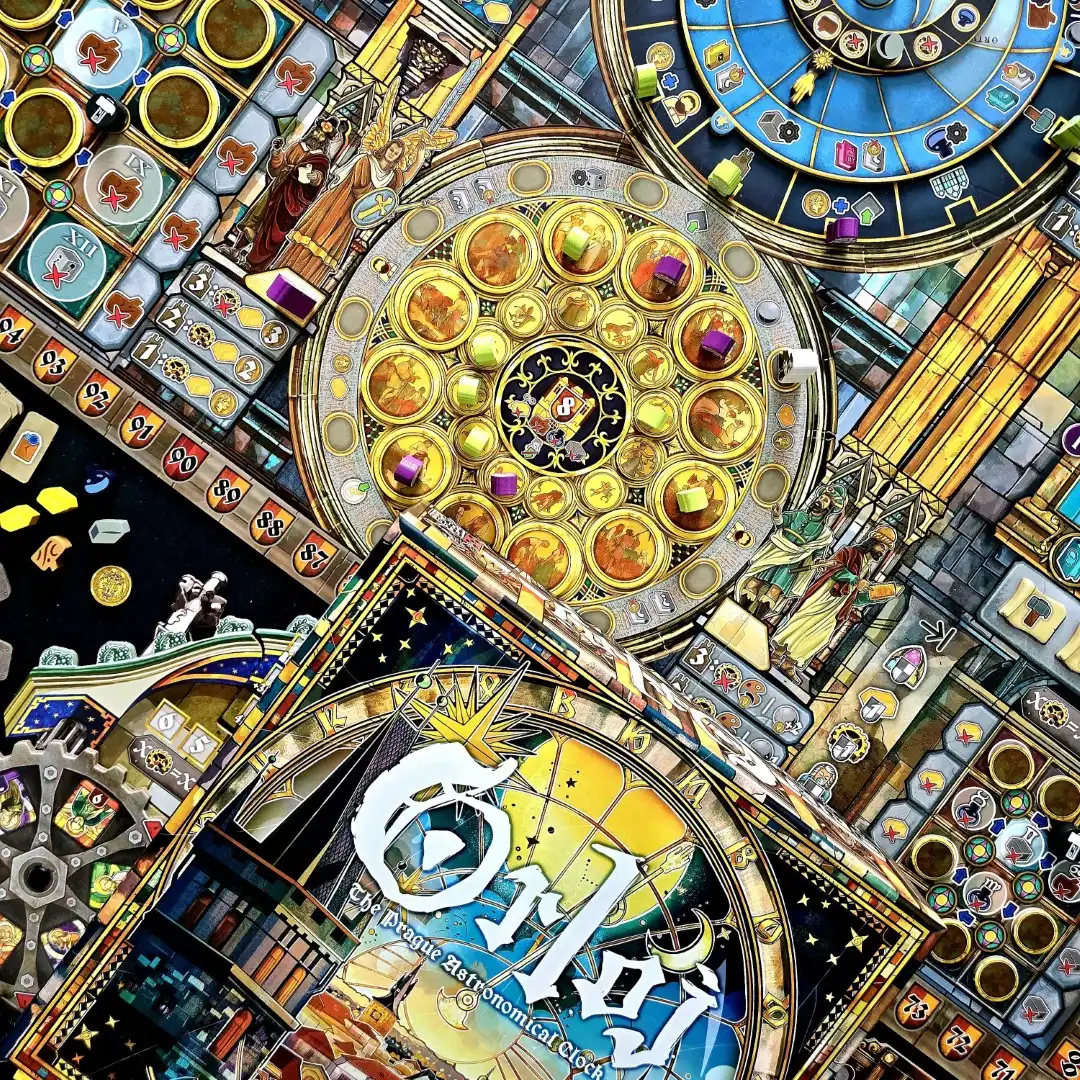
Left: action selection on the titular clock face ; Right: the game board looks somewhat busy at first, but you'll quickly learn the ropes
As for the actions… There are quite a lot of them with a fair bit of nuance. All of them are useful and you’ll likely do them all. Let’s do a quick rundown.
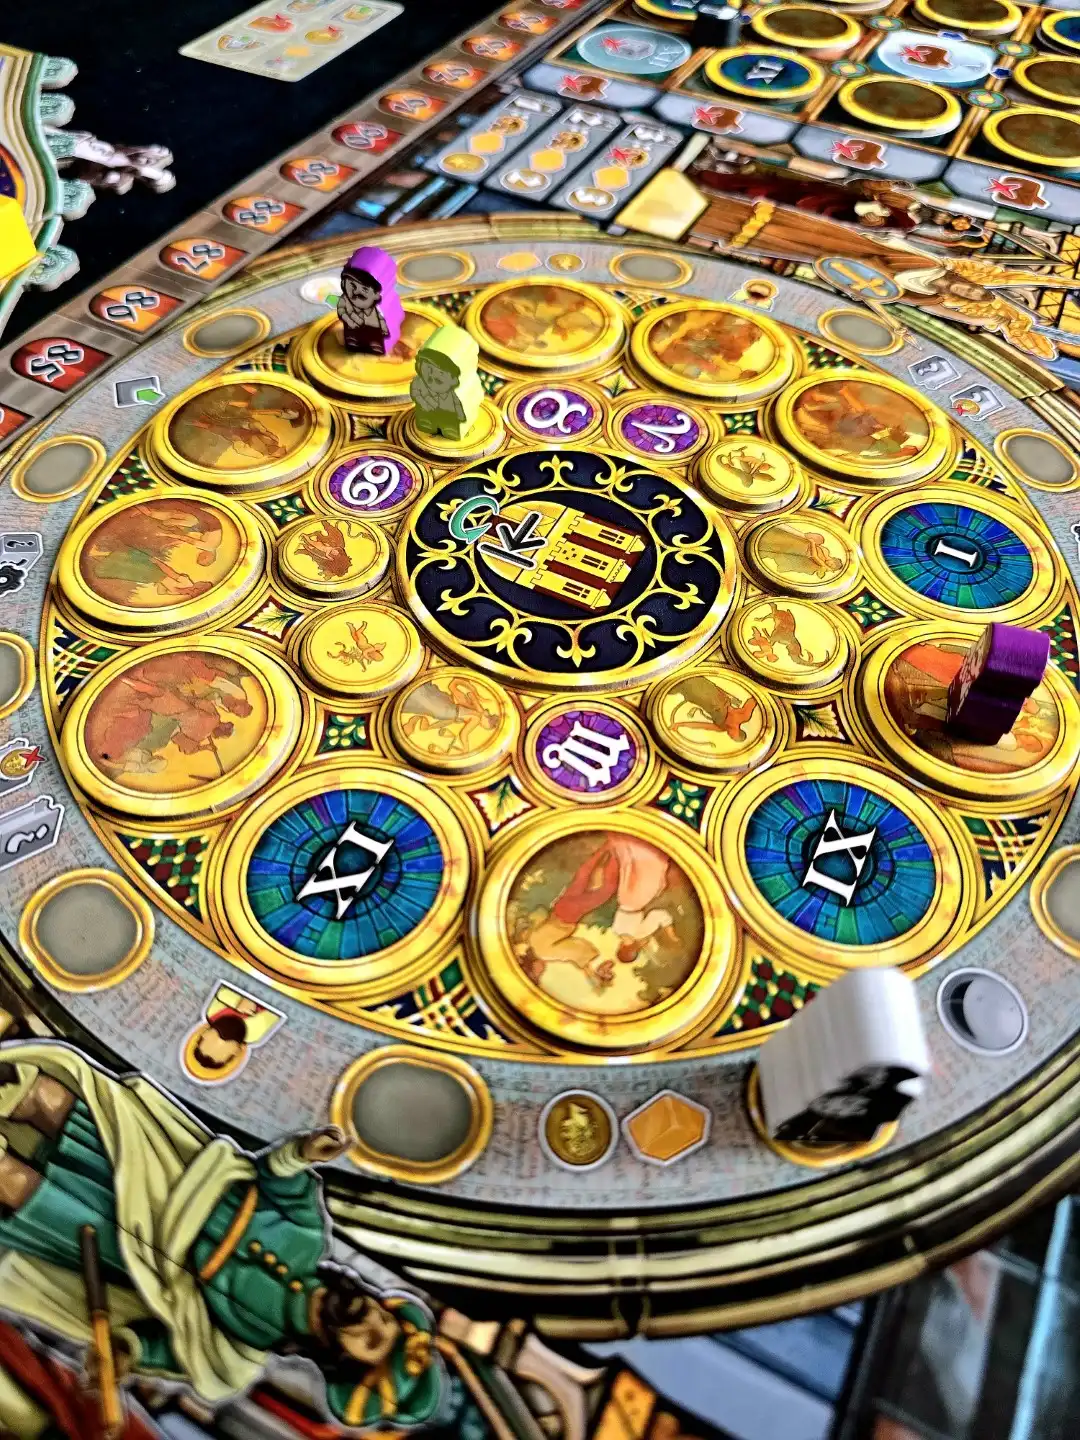
The most important one is definitely the construction action, which lets you build the month and zodiac dials of the clock. This costs lots of resources and you also “lose” (as in lock in) a worker for each dial built, but it is a primary source of victory points. One of the end game triggers is building all the dials. Players get additional points if they get their meeples into big contiguous groups on the constructed dials, so you really have to block others from scoring high, while looking for opportunities yourself.
Besides construction, the following actions are available on the bigger clock face:
- Placing your Sculptor, which is a special meeple activating powerful actions
- Improving resource production on your player board
- The Moon and Painter actions move a shared token on their respective rondel, earning you rewards
- With the Workshop action you can buy cards that have slots to place Assistant tiles for both end game points and immediate bonuses;
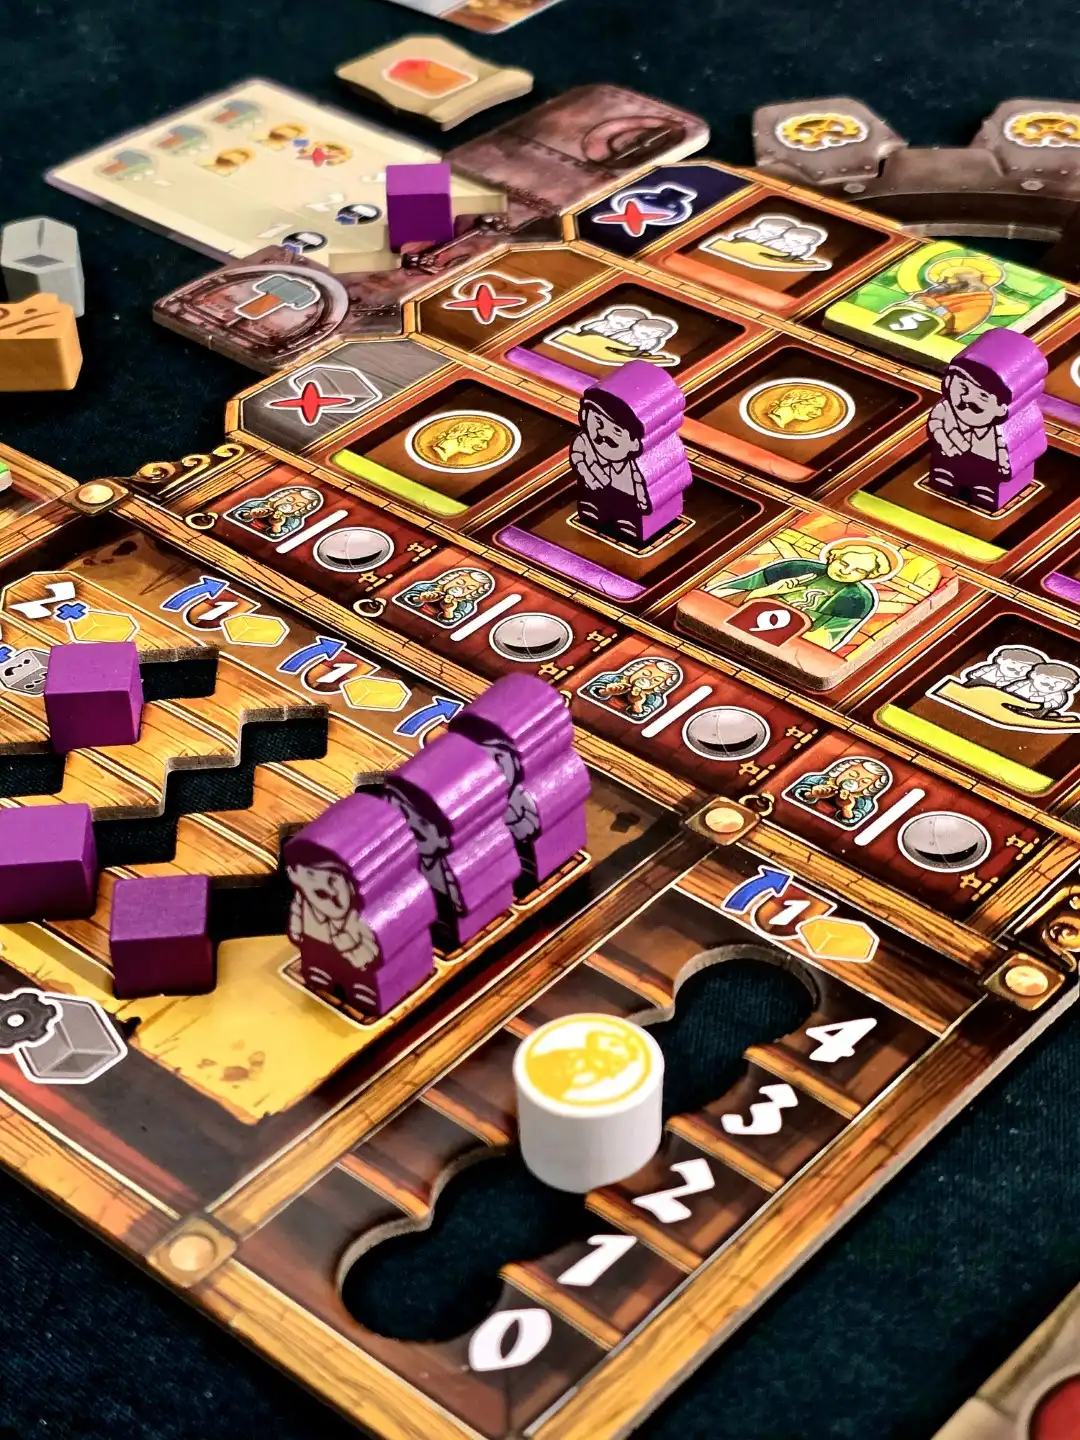
- And you can unlock Apostle tiles. Apostles have a special double-gear board that determines which tiles you can unlock. Apostles can then be slotted on your player board, giving you bonuses both when placing and completing rows/columns.
The inner smaller clock face actions are simple: you either produce resources (depending on your production level) or go up on the three mastery tracks. Tracks are quite cool: As you advance on them, one lets you rotate the inner dial more, one boosts your pass action and improves your Sculptor, and the third one boosts your Moon and Painter actions. You can also grab some immediate bonuses and unlock end game scoring as you climb these tracks.
Left: the three mastery tracks with multiple boons ; Right: the lower part of the clock for placing dials also holds the rondel for the painter pawn
I think it’s best to stop here before it gets overwhelming - just a brief overview. You’ll do these actions many times during the game, with your choices being restricted by the position of the clock dials, and also by your resources. There are 3 public goals you can race for, and the tracks have 3 instant and 3 end game scoring opportunities, so you are also pretty well supplied with short-term and long-term goals to work towards.
At the end of course you score additional points for different things, and whoever gathered the most points wins the game.
Some more general thoughts
Resource management is really fun in the game. There are 3 basic and 2 more advanced resources, and they are needed for multiple things, but you can also earn them in multiple ways. This adds a nice flexibility and interconnectedness, so you always have options - and you constantly need to evaluate those options. The little gear-deviation tokens on your player board are also pretty much a resource: You often force out things by flipping these tokens, so you constantly have to repair them. Workers could also be seen as a resource. You lose access to them as you build dials or claim public goals, but there are 3 ways you can unlock additional workers, which is quintessential.
I love rondels and here you have around 6 of them. The Moon and Painter track are two rondels. When constructing month or zodiac dials you also have to move the Hammer token on its little track to whichever dial you want to build. That’s two more. The action selection clock is another one, then you have the rotating Apostle-gears. I believe you can never have enough rondels.
You also have a lot of the euro staples: getting something you cover up, gaining bonuses upon filling a row or column, or combining two of the same icon halves to activate that action.

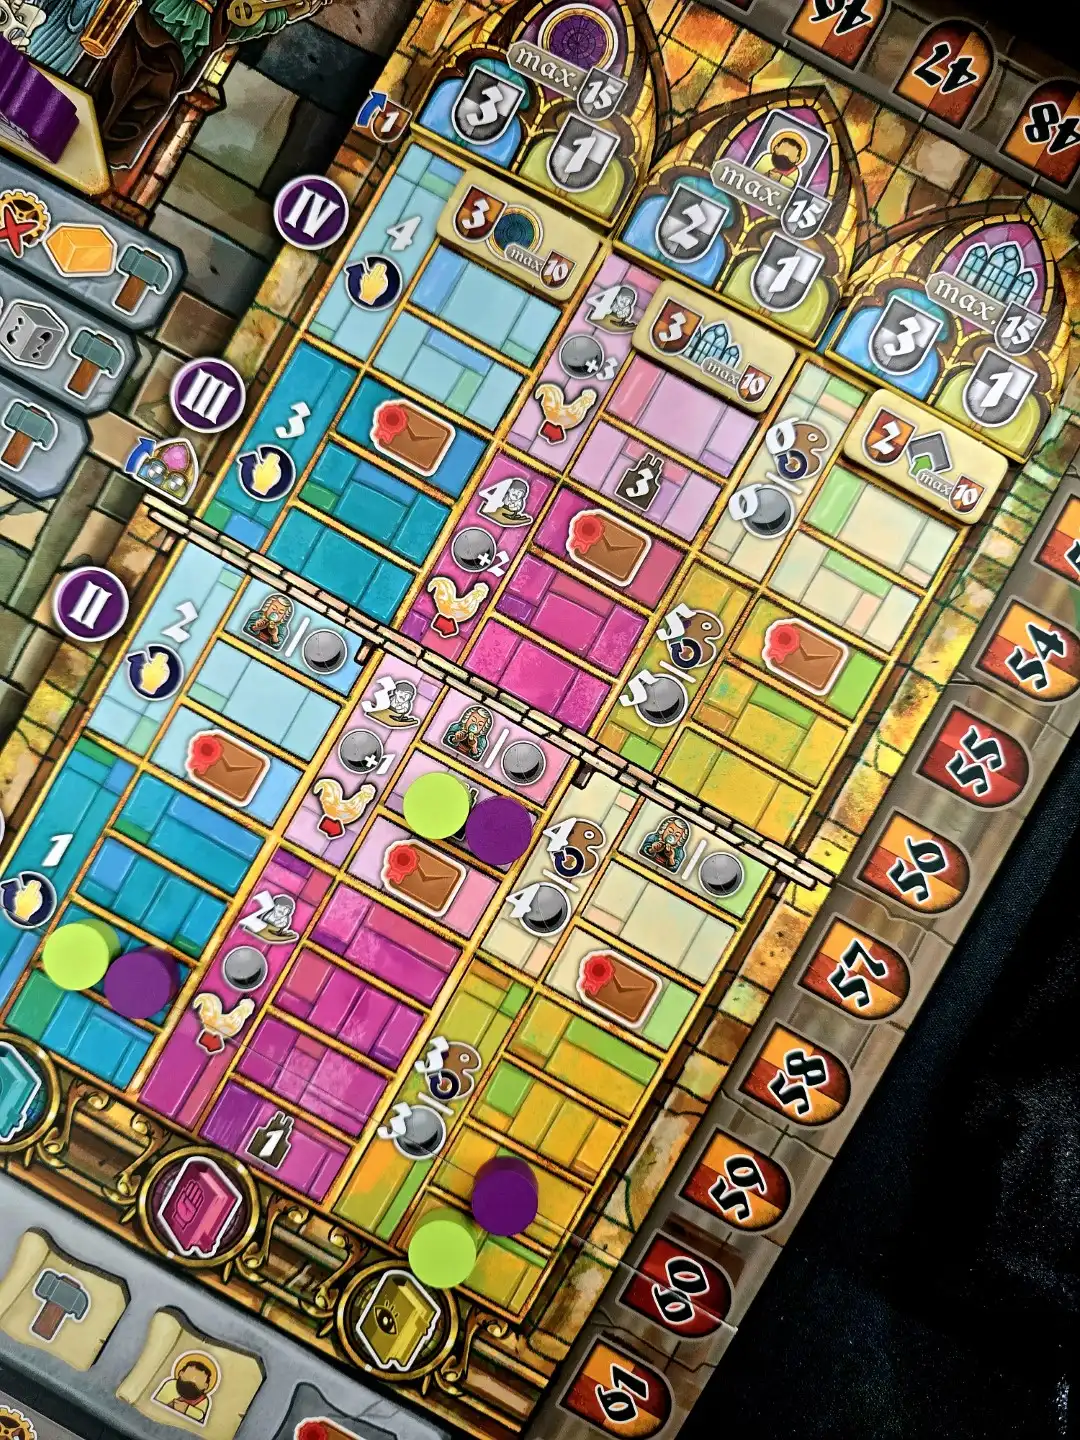
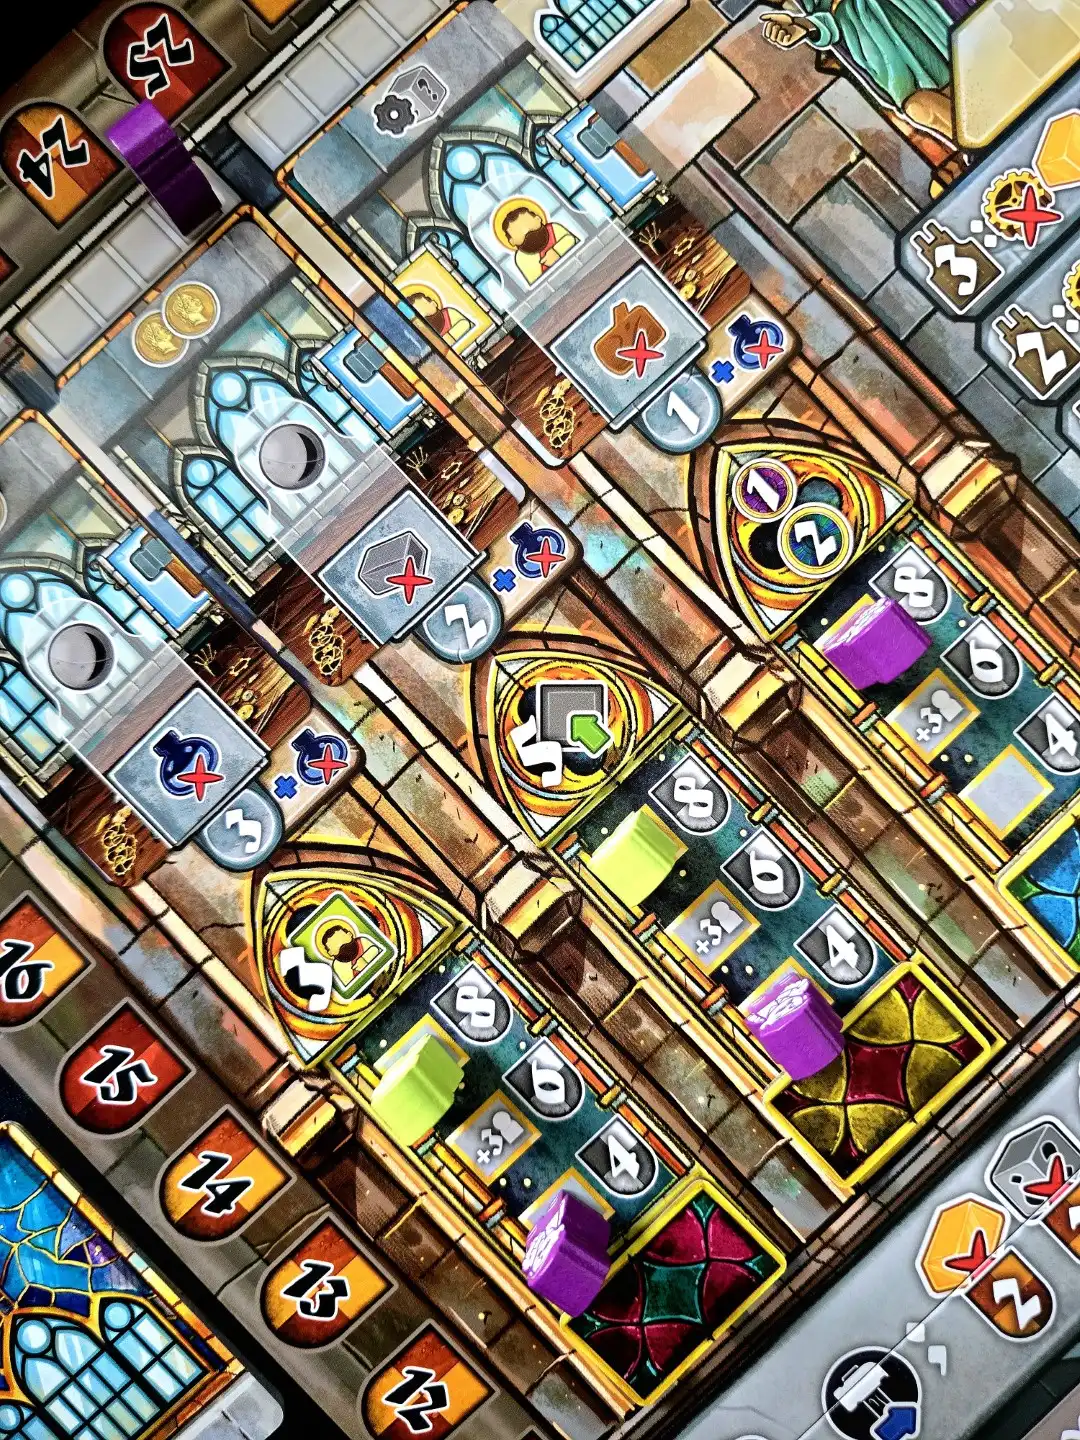
Left: the Moon and Painter rondels hide in plain sight in the center clock faces ; Right: your player board also has a bunch of things going on
I’d almost like to call Orloj a point-salad, because you can do so many different things, but thinking about it more, most of the actions are for acquiring resources to funnel into constructing dials, as that is the primary way of earning points. We really like the way the clock nets you points. I already mentioned that it’s beneficial if you manage to build multiple dials in a continuous group - but timing these is also very interesting. Each dial built increases the cost of future dials taken from the same row or column, but paying more for them also means netting more points, as this scales with the resources spent there. There are of course more ways for scoring, and other actions are also constantly needed, not just for resources but to unlock additional workers.
Let’s not forget the setup variability: Common and end-game goals, bonus tokens, the track for the painter’s rondel are all randomized from a pool of tokens. There are also the starting resources and “Hammer cards” that give you a bonus after each dial construction, a tiny bit like an asymmetric player power, which are drafted at the beginning.
The game looks astonishing. The table presence is off the charts, and components are really good, but the pictures should speak for themselves. Screen printed wooden resources and meeples, thick cardboard and beautiful boards. Okay, the main board is quite saturated and busy, full of symbols, letters and illustrations, but after half a game I really had no problem discerning the different sections. This is a price I am willing to pay in the war against beige-ness.
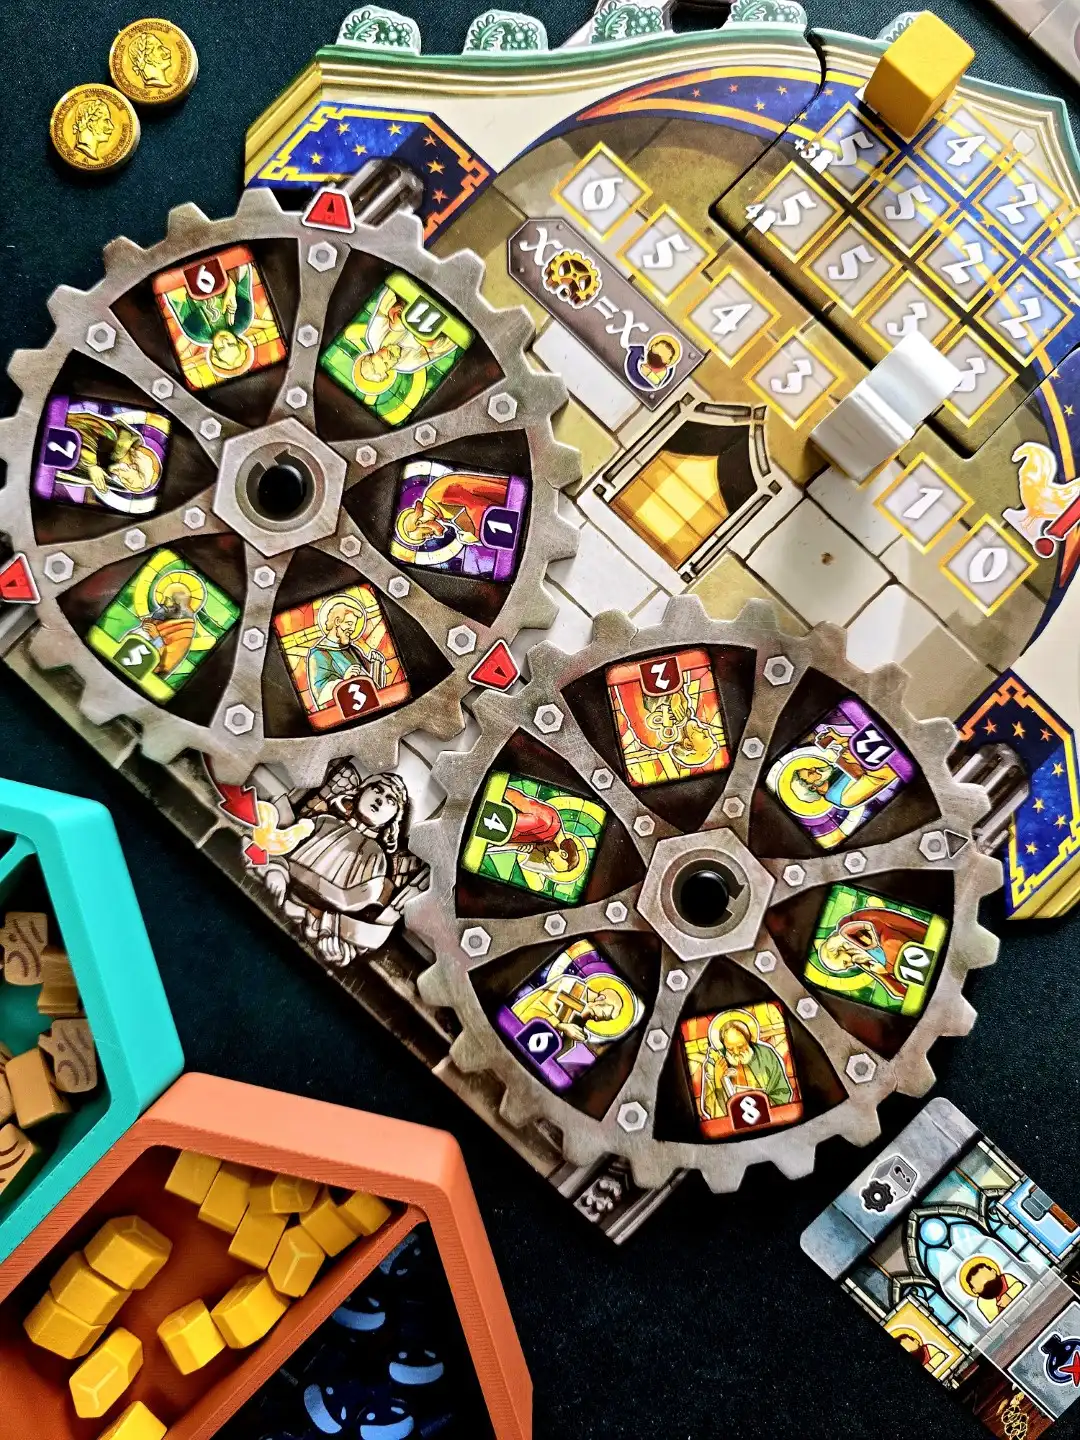

Left: every time an Apostle is taken, the gears are turned ; Right: there are slots on your player board for Apostles
One of our gripes was with the public objectives, as it gets quite cutthroaty in 2-player games. The faster player gets to use a bonus tile and gets 1st place points, while the second to achieve it only gets the 3rd place points and no bonus. So you are basically penalized twice for being slow(er). Otherwise I didn’t feel the need for more players, so I think 2p, 3p and 4p should all be viable player counts - I haven’t tried the solo mode, but there is one.
So that’s Orloj in a slightly oversized nutshell. I hope this summary helps you decide whether the game is for you or not - for combo lovers it should certainly be exciting! I left out a lot of small things, so if you read the rules or sit down to play, you might have some cool surprises.
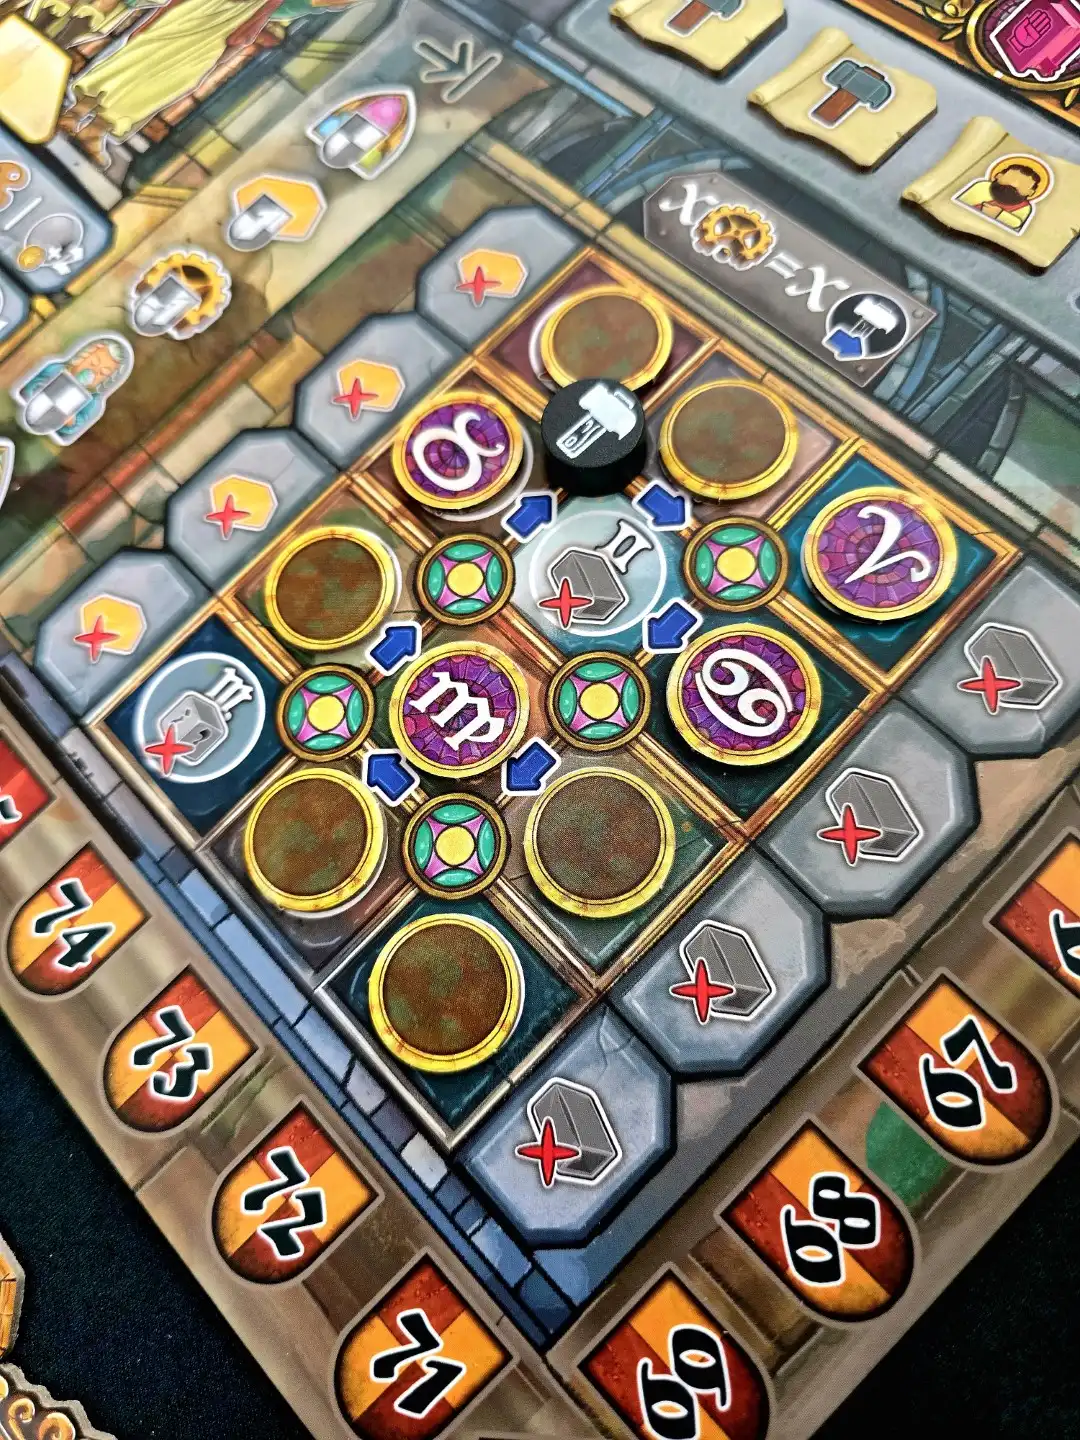
Left: the little rondel for the Hammer token, used during construction ; Right: the available Workshop cards and common objectives
Thanks for reading!
Kristof & Reni
A copy of the game was kindly provided by the publisher. Read our content policy.